背景
我的个人博客使用Hugo搭建,我喜欢这种极简的静态框架,手动编辑markdown文件再用hugo编译后直接更新到github到代码仓里,再由netlify自动发布到网上。
我用Lattics作为个人知识管理和写作工具,这个工具也是免费的,它有一个导出功能,可以将markdown文件和图片等等打包在一个zip压缩包里面,这就给了我进行自动化改造的机会。
基本思路
本自动化发布系统的基本目标是:
- 用Lattics写作完成的页面,导出为zip
- 上传到Google Drive到一个staging文件夹里过渡一下
- Github Action工作流定时查看staging文件夹里是否有zip文件需要处理
- 如果需要处理,则下载到github action进行解压并读取文件,拆解+组装
- 合成hugo所必须的文件和格式
- 提交到hugo所使用的目录里面
- Github Action工作流监听到hugo文件变化后
- 自动用hugo编译
- 提交到发布分支和发布目录
- Netlity监听到发布目录变化后,自动发布
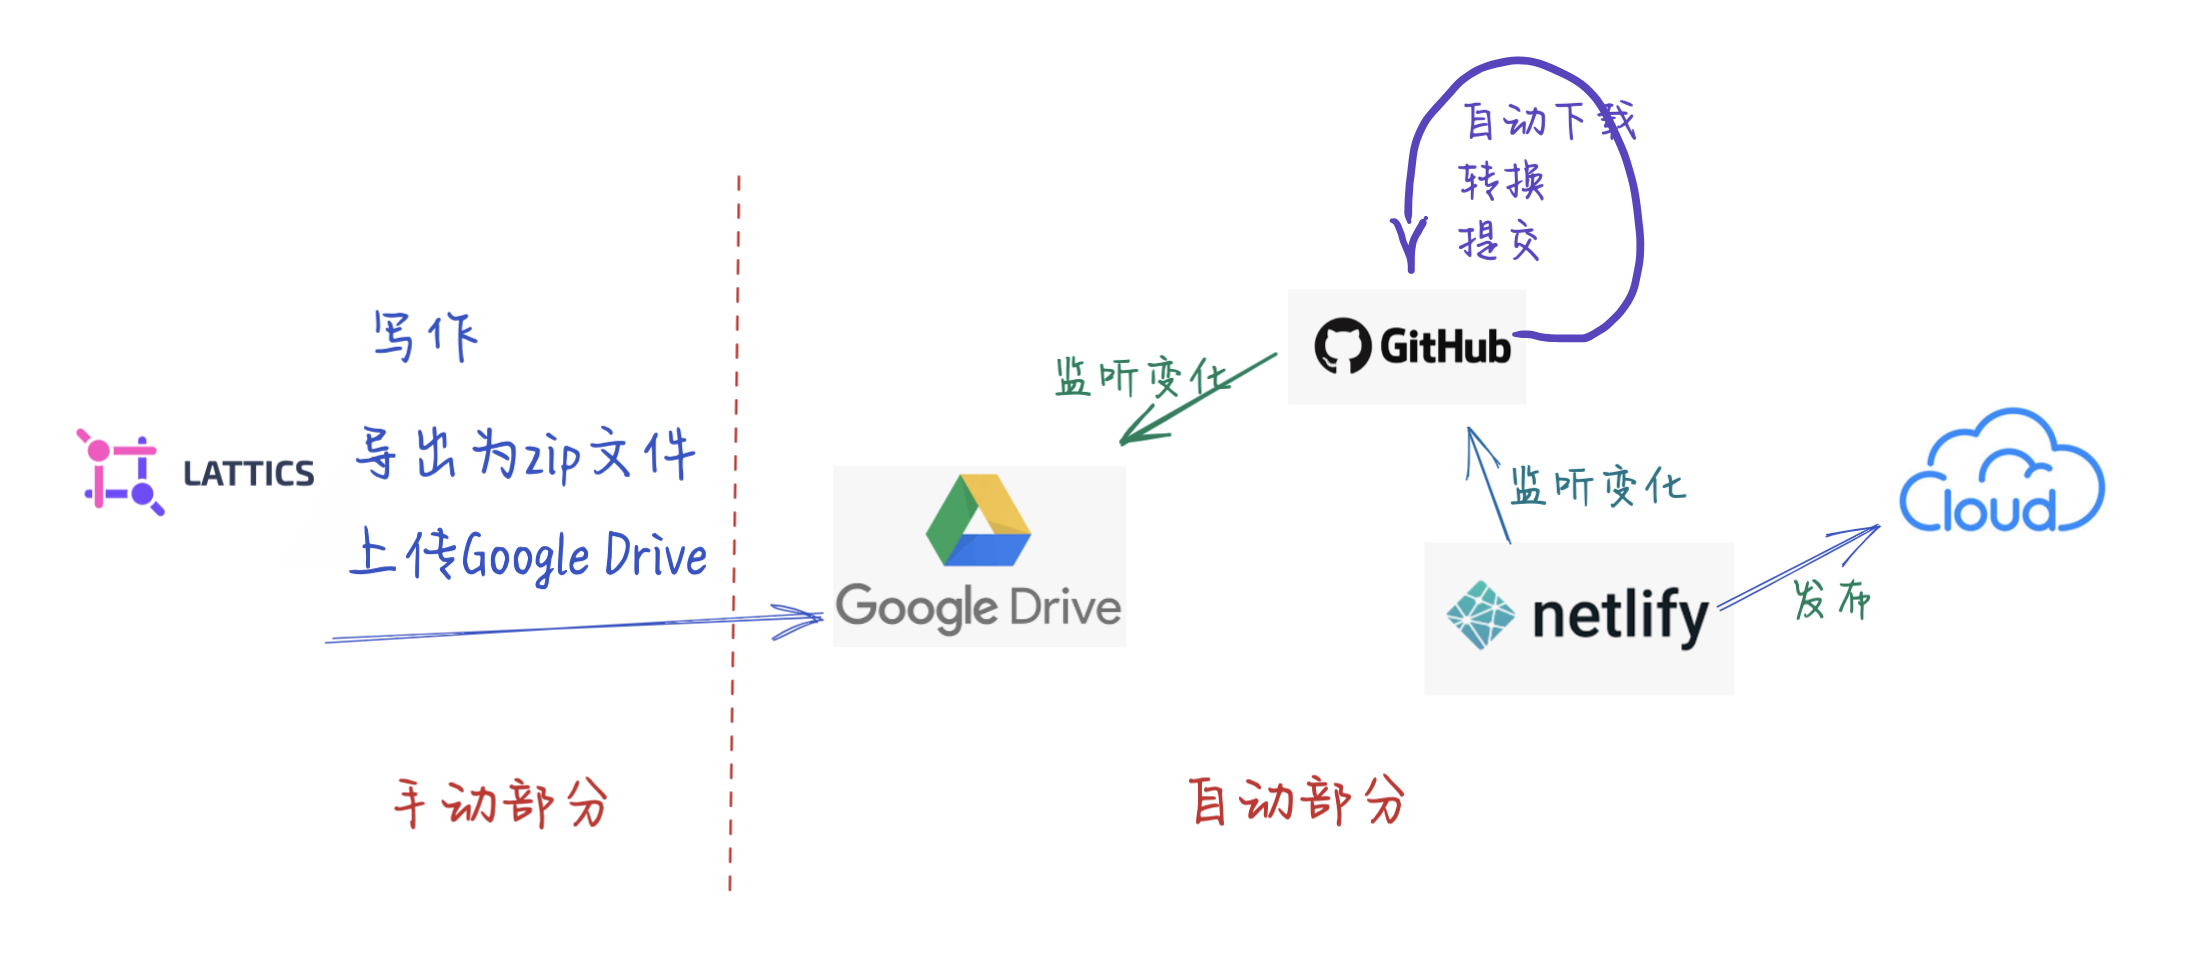
看起来有点长,我来画个图
这里是重点
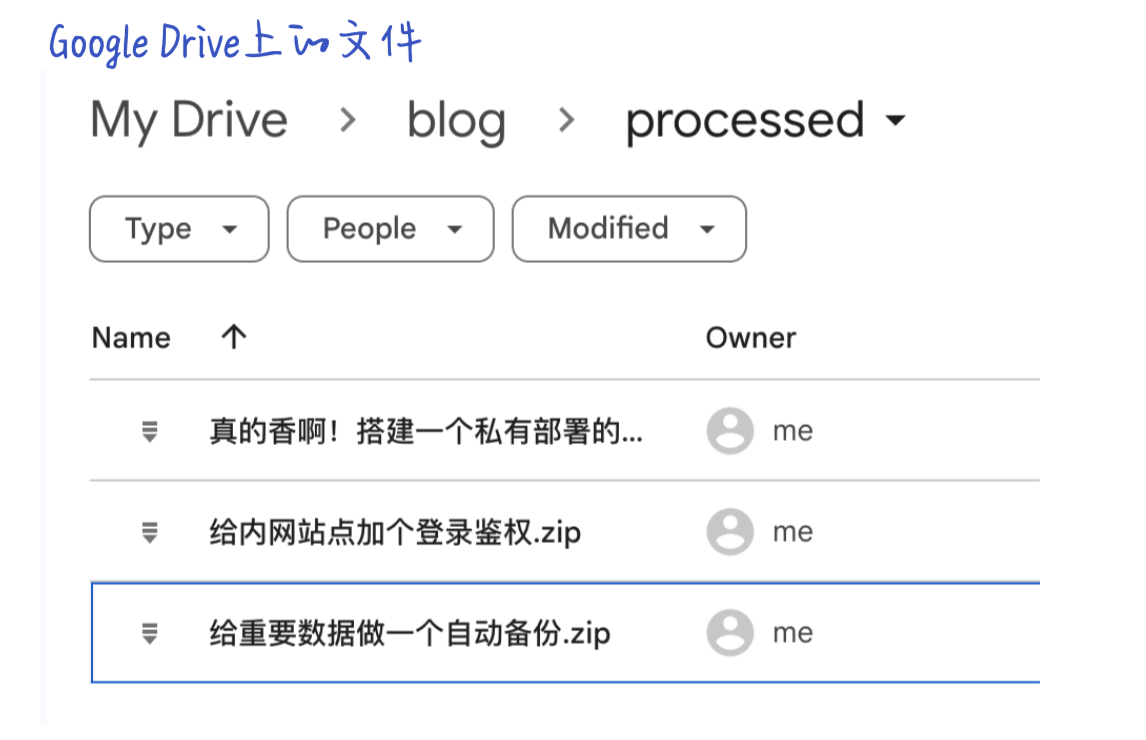
其中Github里面的自动监听Google Drive和文件格式转换是用python写了一个小工具gdrive.py完成的,gdrive.py会访问Google Drive里面预先创建好的“staging”目录,处理完之后会将文件移动到“processed”目录
先看效果
  |
 |
实现
Github Action工作流定时查看Google Drive
定时监控
在工作流文件里指定触发方式如下:
on:
  schedule:
    - cron: "8 9 * * *"
即每天09:08分运行一次,注意这个时间是UTC时间,其实我并不关心几点钟运行,只要每天能运行一次就行。另外,Github会贴心地提醒说,尽量不要设置在0点0分这样,因为很多人都设置在这个时间导致平台工作流负载过高,可能会影响你的工作流运行。听人劝,哈哈。
完整文件:
name: Monitor Gdrive

on:
  # Runs on pushes targeting the default branch
  schedule:
    - cron: "8 9 * * *"

  # Allows you to run this workflow manually from the Actions tab
  workflow_dispatch:

# Default to bash
defaults:
  run:
    shell: bash

jobs:
  check_zip_files:
    runs-on: ubuntu-latest
    steps:
      - name: Checkout
        uses: actions/checkout@v4
        with:
          ref: converter
      - name: setup python
        uses: actions/[email protected]
        with:
          python-version: 3.10.6
      - name: run converter
        id: run_converter
        env:
          GOOGLE_TOKEN: ${{ secrets.GOOGLE_TOKEN }}
        run: |
          cd preblog
          pwd
          pip install --upgrade pip && pip install -r requirements.txt
          python gdrive.py
          cd ..
          [ -d "new_posts" ] && echo "do_next_job=yes" >> $GITHUB_OUTPUT || echo "do_next_job=no" >> $GITHUB_OUTPUT
          [ -f "preblog/token.json" ] && echo "new_token=yes" >> $GITHUB_OUTPUT || echo "new_token=no" >> $GITHUB_OUTPUT
      - name: Upload new posts artifact
        if: ${{ steps.run_converter.outputs.do_next_job == 'yes' }}
        uses: actions/[email protected]
        with:
          name: new_posts
          path: new_posts
      - name: Upload new token
        if: ${{ steps.run_converter.outputs.new_token == 'yes' }}
        uses: actions/[email protected]
        with:
          name: new_token
          path: preblog/token.json
      - name: Update action secret token
        if: ${{ steps.run_converter.outputs.new_token == 'yes' }}
        env:
          OWNER: codeoria
          REPOSITORY: hugo-blog
          ACCESS_TOKEN: ${{ secrets.PATOKEN }}
          SECRET_NAME: GOOGLE_TOKEN
        run: |
          cd preblog
          export SECRET_VALUE=$(cat token.json)
          python action_secret.py

    outputs:
      do_next_job: ${{ steps.run_converter.outputs.do_next_job }}

  merge-into-master:
    needs: check_zip_files
    if: needs.check_zip_files.outputs.do_next_job == 'yes'
    runs-on: ubuntu-latest
    permissions:
      contents: write
    steps:
      - name: checkout master branch
        uses: actions/[email protected]
        with:
          ref: master

      - name: Download website build
        uses: actions/[email protected]
        with:
          name: new_posts
          path: new_posts
      - name: merge and push
        env:
          GITHUB_TOKEN_2: ${{ secrets.PATOKEN }}
        run: |
          cp -r new_posts/* content/post/
          git config --global user.email ${GITHUB_ACTOR}@users.noreply.github.com
          git config --global user.name ${GITHUB_ACTOR}
          git add .
          git commit -m "auto publish"
          git push --force https://${GITHUB_ACTOR}:${GITHUB_TOKEN_2}@github.com/${GITHUB_REPOSITORY}.git HEAD:master
简单解释一下,
里面有两个job,首先是看看有没有zip文件在staging里,如果有的话执行第二个job即提交到master分支,我的另一个工作流会监控master分支到变化,自动发布到netlify。
如何读取、下载、移动文件的
python 源代码也给你,这里会查看staging目录,会下载zip文件,会移动处理过文件到processed目录。转换函数convert_zip_file在下节描述。
# -*- coding: utf-8 -*-

import os.path
import json
import shutil

from google.auth.transport.requests import Request
from google.oauth2.credentials import Credentials
from google_auth_oauthlib.flow import InstalledAppFlow
from googleapiclient.discovery import build
from googleapiclient.errors import HttpError
from googleapiclient.http import MediaIoBaseDownload
from preblog import convert_zip_file

# If modifying these scopes, delete the file token.json.
SCOPES = ["https://www.googleapis.com/auth/drive"]


staging_file_id = "这里是google drive上staging目录的id"
processed_file_id = "这里是google drive上processed目录的id"


def get_staging_zip_files(service, staging_id):
    results = (
        service.files()
        .list(
            q=f"name contains '.zip' and '{staging_id}' in parents",
            pageSize=100,
            fields="nextPageToken, files(id, name, modifiedTime, createdTime, parents)",
        )
        .execute()
    )
    items = results.get("files", [])
    return items


def download_zip_file(service, file_id, file_name, modifiedAt):
    dl_dir = "download"
    if not os.path.exists(dl_dir):
        os.mkdir(dl_dir)
    try:
        request = service.files().get_media(fileId=file_id)
        with open(os.path.join(dl_dir, file_name), "wb") as zf:
            downloader = MediaIoBaseDownload(zf, request)
            done = False
            while done is False:
                status, done = downloader.next_chunk()
                print(f"Downloading {file_name} {int(status.progress() * 100)}.")
    except Exception as e:
        print(f"failed to handle {file_id}({file_name}): {e}")
        return False

    return True


def move_file_to_processed(service, file_id, file_name, from_parent_id, to_parent_id):
    try:
        result = (
            service.files()
            .update(
                fileId=file_id, addParents=to_parent_id, removeParents=from_parent_id
            )
            .execute()
        )
        print(result)
    except Exception as e:
        print("failed to move file()")
        return False
    return True


def main():
    creds = get_credentials()

    try:
        service = build("drive", "v3", credentials=creds)

        # get all staging zip files:
        items = get_staging_zip_files(service, staging_file_id)
        base_abs_path = os.path.abspath(os.path.join(os.path.dirname(__file__), ".."))
        new_posts = []
        for item in items:
            print(f"{item['name']} ({item['id']})")
            dl = download_zip_file(
                service, item["id"], item["name"], item["modifiedTime"]
            )
            if not dl:
                continue

            new_post = convert_zip_file(
                base_abs_path,
                os.path.abspath(os.path.join(os.path.dirname(__file__), "download")),
                item["name"],
                item["modifiedTime"],
            )
            new_posts.append(new_post)
            # move file to processed
            mv = move_file_to_processed(
                service, item["id"], item["name"], staging_file_id, processed_file_id
            )
            if not mv:
                continue

        # archive new_posts
        new_post_path = os.path.join(base_abs_path, "new_posts")
        for new_post_file in new_posts:
            if os.path.exists(new_post_file):
                if not os.path.exists(new_post_path):
                    os.mkdir(new_post_path)
                shutil.move(new_post_file, new_post_path)
    except Exception as error:
        # TODO(developer) - Handle errors from drive API.
        print(f"An error occurred: {error}")


def get_credentials():
    creds = None
    is_local = os.getenv("LOCAL") == "1"
    if is_local:
        if os.path.exists("token.json"):
            creds = Credentials.from_authorized_user_file("token.json", SCOPES)
    else:
        gtoken = os.getenv("GOOGLE_TOKEN")
        creds = Credentials.from_authorized_user_info(json.loads(gtoken), SCOPES)

    if not creds or not creds.valid:
        if creds and creds.expired and creds.refresh_token:
            creds.refresh(Request())
        else:
            if is_local:
                flow = InstalledAppFlow.from_client_secrets_file(
                    "credentials.json", SCOPES
                )
                creds = flow.run_local_server(port=0)
            else:
                raise Exception("invalid token")
        # Save the credentials for the next run
        with open("token.json", "w") as token:
            token.write(creds.to_json())
    return creds


if __name__ == "__main__":
    main()
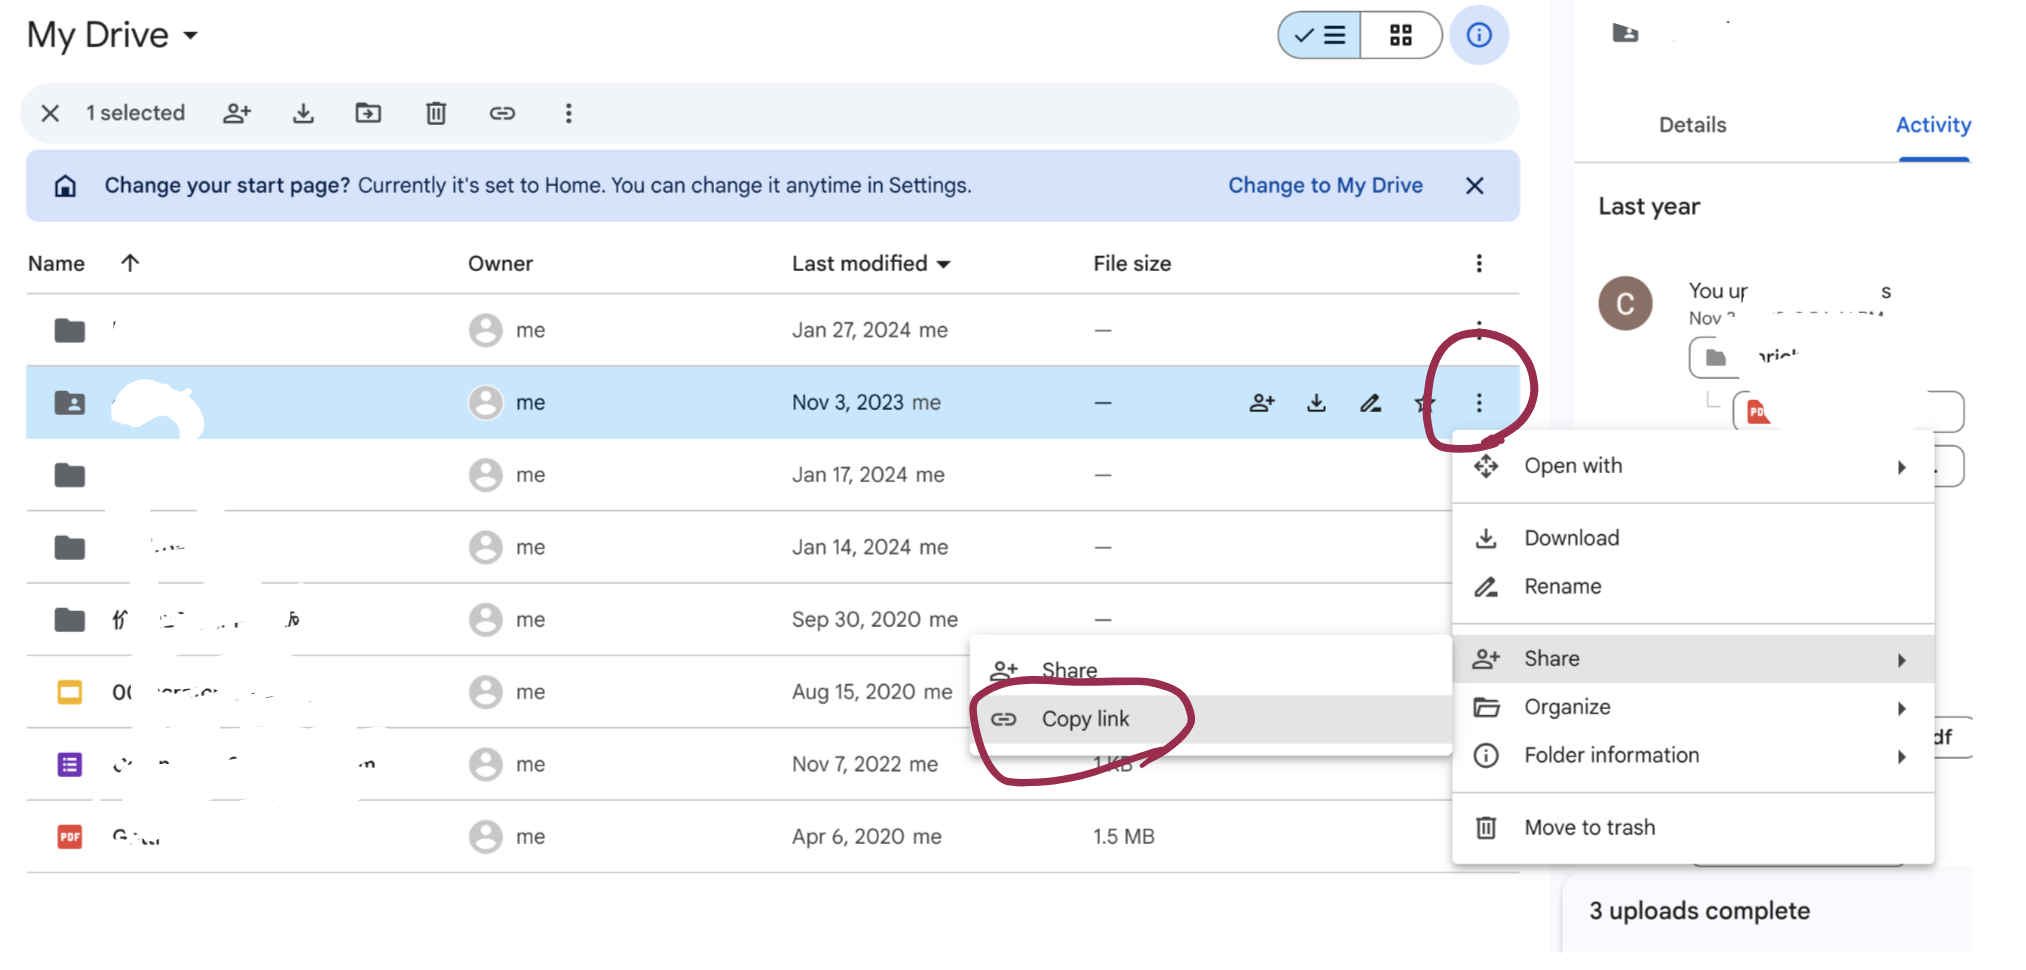
里面的“staging_file_id"需要从Google Drive选中目录之后点击“共享”->复制链接,在链接的中间部分为file_id,例如“https://drive.google.com/drive/folders/[这个部分是file_id]?usp=drive_link”
在本地运行gdrive.py文件是需要设置环境变量,用于保存token.json,这个文件不要提交到代码仓里,也不要共享给别人
export LOCAL=1
如何转换文件
这里的转换主要是为Lattics生成的markdown文件添加必要的文件头作为hugo的Front Matter。Hugo用Front Matter来为页面添加必要页头图片、分类信息、标签信息等等。如下图
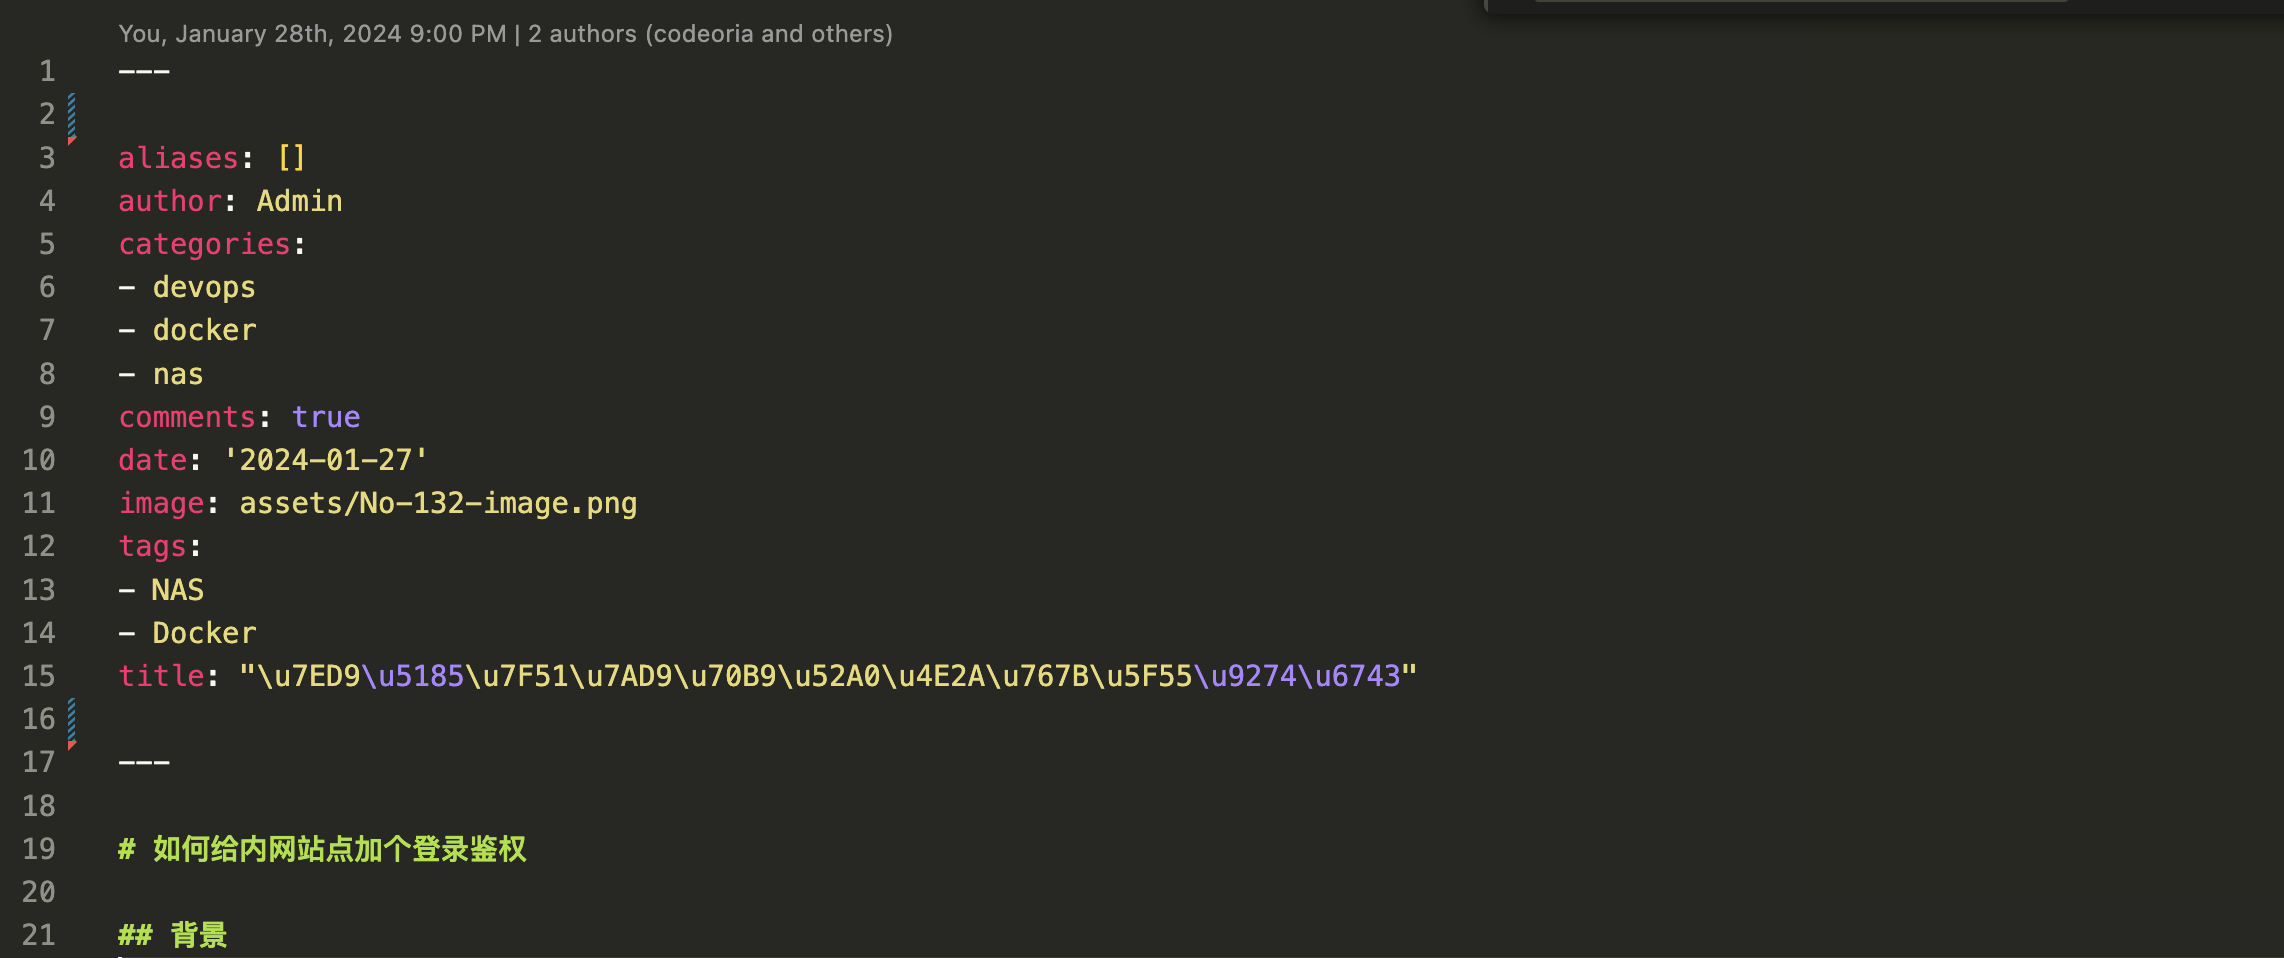
Front Matter 可以用toml格式或者yaml格式,位于页面顶部, 我用的是yaml格式,上图是由python代码生成的
Front Matter的格式定好了,那么这些信息从哪里来?
我在Lattics编辑时,给每篇文章增加了一个头部表格,在Lattics里面看起来是这样的:
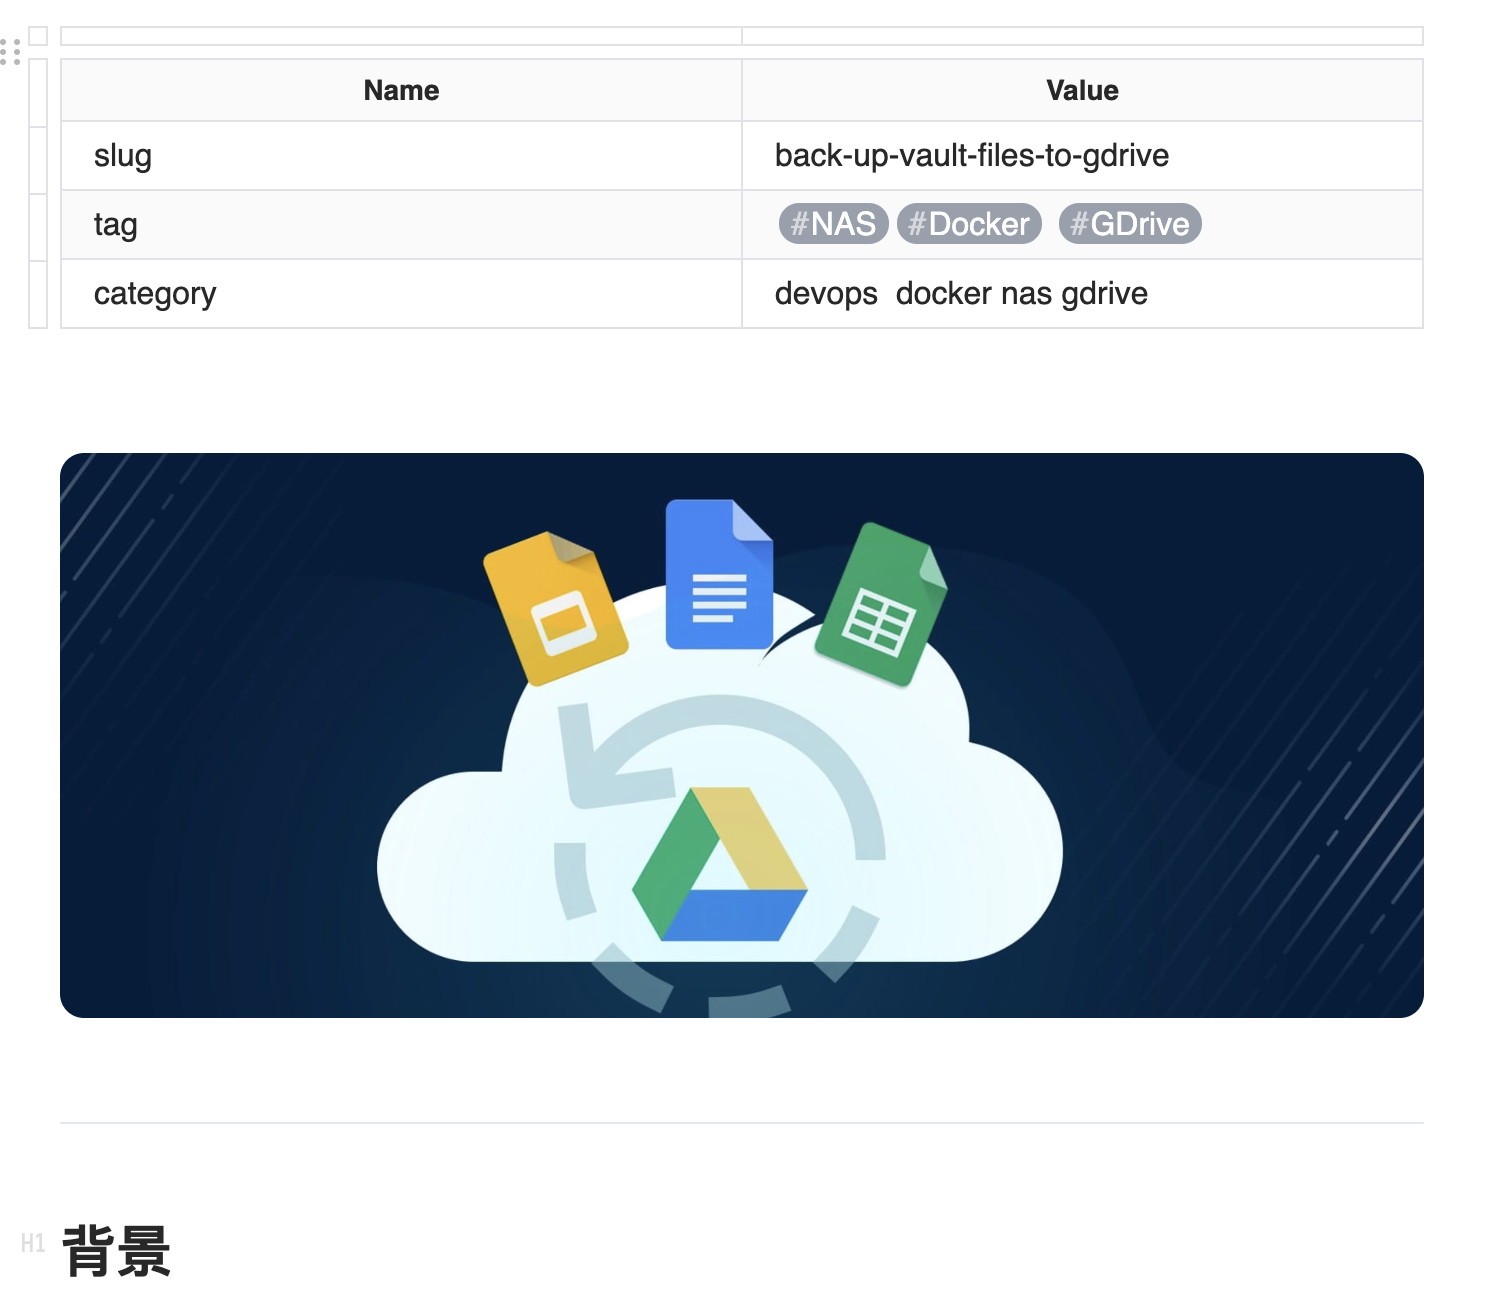 在markdown源码里看起来是这样的:
| Name | Value |
|---|---|
| slug | back-up-vault-files-to-gdrive |
| tag | [#NAS][#Docker] [#GDrive] |
| category | devops docker nas gdrive |

---
# 背景
转换函数convert_zip_file
上代码
import datetime
import json
import os
import re
import shutil
import yaml
import zipfile
import pytz


def process_lines(lines, md_file_name, updatedTime):
    regex_slug = r"^\|\s*slug\s*\|\s*([\w-]*)\s*\|$"
    regex_tag = r"\[#(.*?)\]"
    regex_category = r"^\|\s*category\s*\|\s*([\w\s]*)\s*\|$"
    regex_image = r"^!\[\]\(\./(.*)\)"
    regex_hr = r"^---$"
    newlines = []
    meta = {
        "author": "Admin",
        "title": md_file_name,
        "date": updatedTime.strftime("%Y-%m-%d"),
        "tags": [],
        "categories": [],
        "aliases": [],
        "image": "",
        "comments": True,
    }
    slug = ""
    found_header = False
    for line in lines:
        if len(slug) == 0:
            find = re.findall(regex_slug, line)
            if len(find) > 0:
                slug = find[0]
                continue
        if len(meta["tags"]) == 0:
            find = re.findall(regex_tag, line)
            if len(find) > 0:
                meta["tags"] = find
                continue
        if len(meta["categories"]) == 0:
            find = re.findall(regex_category, line)
            if len(find) > 0:
                cs = [x.strip() for x in find[0].split(" ") if len(x.strip()) > 0]
                meta["categories"] = cs
                continue
        if meta["image"] == "":
            find = re.findall(regex_image, line)
            if len(find) > 0:
                meta["image"] = find[0]
                continue
        if not found_header:
            find = re.findall(regex_hr, line)
            if len(find) > 0:
                found_header = True
                continue

        if found_header:
            newlines.append(line.replace("assets/", "assets/"))

    return meta, newlines, slug


def convert_zip_file(base_abs_path, dl_abs_path, zip_file, updated):
    print(os.path.join(dl_abs_path, zip_file))
    temp_dir = os.path.join(base_abs_path, "temp")
    updatedTime = datetime.datetime.strptime(updated, "%Y-%m-%dT%H:%M:%S.%fZ").replace(
        tzinfo=datetime.timezone.utc
    )
    updatedTime = updatedTime.astimezone(pytz.timezone("Australia/Brisbane"))
    with zipfile.ZipFile(os.path.join(dl_abs_path, zip_file), "r") as zf:
        md_file_name = zip_file[:-4]
        zf.extractall(temp_dir)

    with open(os.path.join(temp_dir, f"{md_file_name}.md"), "r") as mdf:
        lines = mdf.readlines()
        meta, newlines, slug = process_lines(lines, md_file_name, updatedTime)
        with open(os.path.join(temp_dir, "index.md"), "w") as wmd:
            wmd.writelines(["---\n", " \n", " \n"])
            yaml.dump(meta, wmd)
            wmd.writelines([" \n", " \n", "---\n"])

            wmd.writelines(newlines)

        os.remove(os.path.join(temp_dir, f"{md_file_name}.md"))

        dest = os.path.join(base_abs_path, "content", "post", slug)
        now = datetime.datetime.now()
        if os.path.exists(dest):
            dest = os.path.join(
                base_abs_path,
                "content",
                "post",
                f'{slug}-{now.strftime("%Y%m%d")}-{now.timestamp()}',
            )
        shutil.move(
            temp_dir,
            dest,
        )
        return dest
“convert_zip_file” 会返回个转换好的路径
如何触发hugo自动编译
一旦新的post转换完成,我需要调用hugo编译从而生成用于显示的网页,实现这个功能的方法也是Github Action工作流。
name: Build Hugo site

on:
  # Runs on pushes targeting the default branch
  push:
    branches: ["master"]
    paths:
      - "**"
      - "!preblog/**"
      - "!.github/**"
      - "!.vscode/**"
      - "!.gitignore"

  # Allows you to run this workflow manually from the Actions tab
  workflow_dispatch:

# Default to bash
defaults:
  run:
    shell: bash

jobs:
  # Build job
  build:
    runs-on: ubuntu-latest
    env:
      HUGO_VERSION: 0.120.4
    steps:
      - name: Install Hugo CLI
        run: |
          wget -O ${{ runner.temp }}/hugo.deb https://github.com/gohugoio/hugo/releases/download/v${HUGO_VERSION}/hugo_extended_${HUGO_VERSION}_linux-amd64.deb \
          && sudo dpkg -i ${{ runner.temp }}/hugo.deb
      - name: Checkout
        uses: actions/checkout@v4
        with:
          submodules: recursive
      - name: Build with Hugo
        env:
          # For maximum backward compatibility with Hugo modules
          HUGO_ENVIRONMENT: production
          HUGO_ENV: production
        run: |
          hugo \
            --minify
      - name: Upload artifact
        uses: actions/[email protected]
        with:
          name: public
          path: ./public

  commit-build:
    needs: build
    runs-on: ubuntu-latest
    permissions:
      contents: write
    steps:
      - name: checkout web branch
        uses: actions/[email protected]
        with:
          ref: web

      - name: Download website build
        uses: actions/[email protected]
        with:
          name: public
          path: ./public

      - name: commit and push
        env:
          GITHUB_TOKEN: ${{ secrets.GITHUB_TOKEN }}
        run: |
          ls -al
          ls -al public
          git config --global user.email ${GITHUB_ACTOR}@users.noreply.github.com
          git config --global user.name ${GITHUB_ACTOR}
          git status
          git add -f public
          git commit -m "gh-actions deployed a new website build"
          git push --force https://${GITHUB_ACTOR}:${GITHUB_TOKEN}@github.com/${GITHUB_REPOSITORY}.git HEAD:web
这里也是两个job,首先是在master分支上用hugo编译页面,完成后把编译产物暂存,第二个job把编译产物推送到web分支上。而web分支的public目录正是我之前在netlify上关联好的网站目录,一旦web分支发生变化,netlify会自动发布最新网站。
几个注意事项
- 从python访问Google Drive的配置,这个可以参考https://developers.google.com/drive/api/quickstart/python
- 在Github Action里面更新Action Secret, 这个主要是用了github的rest api,我的代码里有“action_secret.py",见https://github.com/codeoria/update-github-actions-secret/blob/main/run.py,原始代码来自“ekowcharles/update-github-actions-secret” 之所以不用他的,是因为他写死了只能用于新建secret,导致工作流失败,而我需要更新已有secret
- 在一个工作流里修改的master分支的内容,master上工作流未被触发,原因是不能使用“secrets.GITHUB_TOKEN”,而是要使用专门的Personal Access Token(PAT),搜索上述代码里面的“GITHUB_TOKEN_2”就可以看到
